Once your website is in production, it is essential that you take regular backup of your website. Aside from regular automated backup, you should also maintain your own backup copy as well. Today we will discuss how can you backup and restore your WordPress site easily using UpdraftPlus backup plugin.
Why do you need Backup & Restore Solution?
Most of the hosting providers offer backup and restore option with the web hosting service. But there is a time when you need latest backup in certain conditions like during regular WordPress update, plugins update, theme update or compromised/hacked website. You should maintain regular backup so that you can obtain latest data if such conditions are arised.
WordPress does not come with built-in backup solution but you can use several great WordPress backup plugins which allow you to automatically backup and restore your WordPress site.
UpdraftPlus is one of the best WordPress backup plugins which allows you to setup automatic backup schedules. It will also help you restore your WordPress site in case something bad happens.

Creating WordPress Backup with UpdraftPlus
Before you begin with backing up your WordPress website, you will need to install UpdraftPlus WordPress plugin. Login to your WordPress admin area and go to Plugins » Add New and search for UpdraftPlus plugin as shown below:
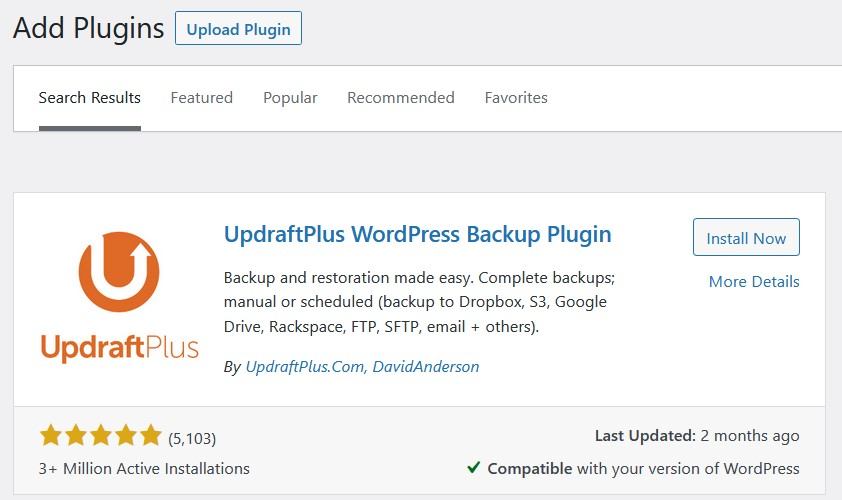
Click on “Install Now” button to begin the plugin installation. Once it is installed, “Activate” it. Now, you have successfully activated UpdraftPlus backup plugin. Upon activation, you need to visit Settings » UpdraftPlus Backups page to configure plugin settings.
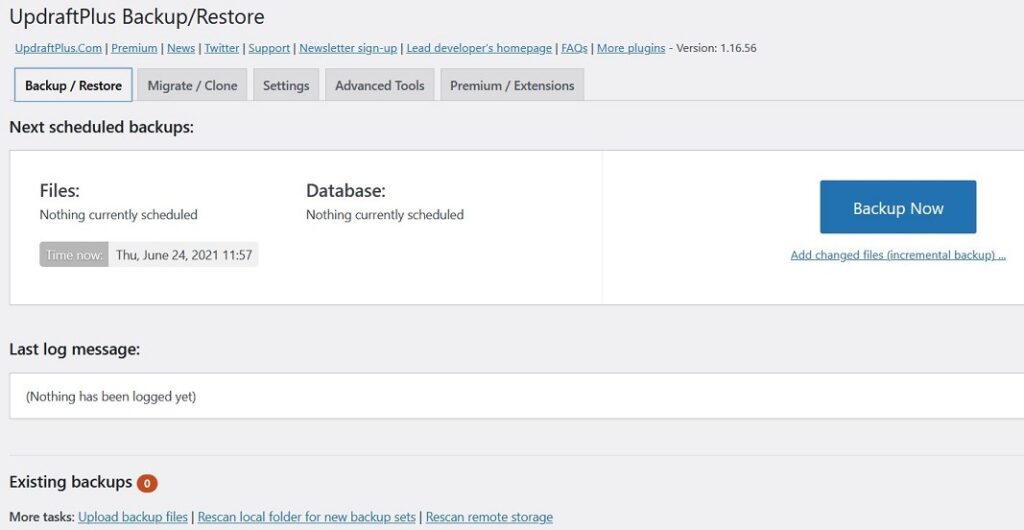
Now you need to click on the settings tab. From settings tab, you will need to setup automatic backup schedule and backup destination to store your website’s backup.
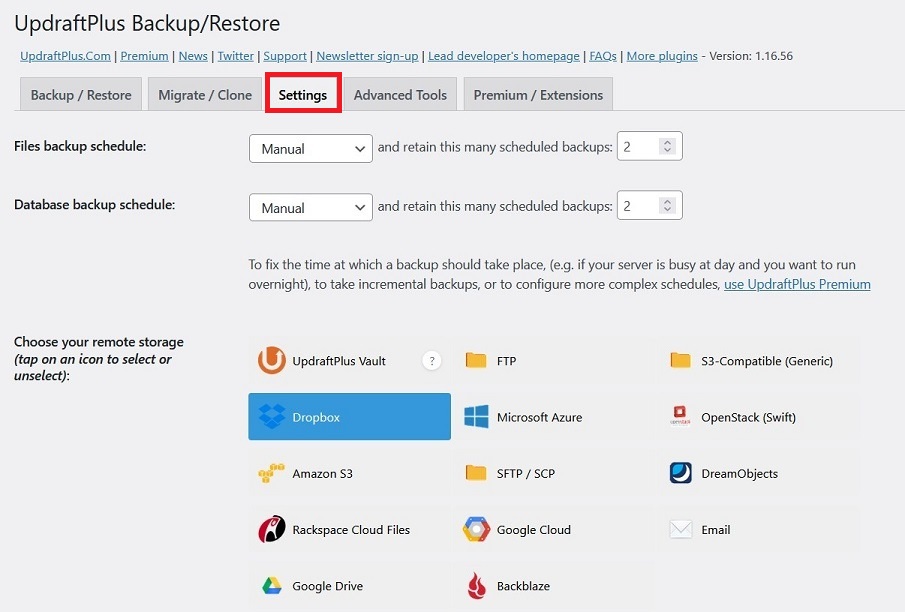
On settings tab, you will need to configure the following options:
- Files backup schedule
This option will configure to backup your WordPress files/folders. Files include your WordPress themes, plugins, images and uploads.
- Database backup schedule
Select a backup schedule for your WordPress database. WordPress stores all the posts, pages, comments, configurations etc. in the database.
You can select the backup frequency based on how frequently you are updating your website, posts, pages and other settings.
- Choose your remote storage
It is a bad idea to select the local storage as backup because if your contents are compromised or hacked, it may affect your local backup as well. That’s why you should select the remote storage for your backups.
UpdraftPlus allows you to save your backups to several cloud storage services including Dropbox, Google Drive, Microsoft OneDrive, and many others. You can also send your backups to an email address if it is not a large size.
To configure remote backup, you will need to select the provider and you will see that setup instruction for that particular provider. In this tutorial, we will discuss how can you use Dropbox as remote backup storage. You will need to select “Dropbox” as backup destination as shown in the above image.
Scroll down to remote storage setup instructions and click on the link next to ‘Authenticate with Dropbox‘ option.
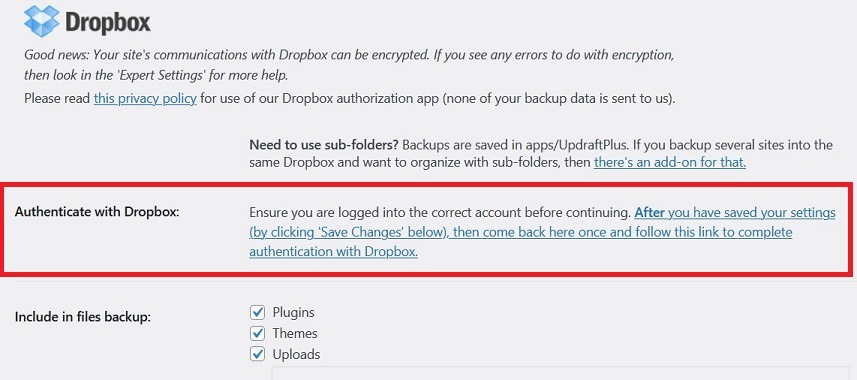
The link will take you to the Dropbox website where you will be asked to sign-in using your Dropbox email and password. After login, you will be asked if you want to allow UpdraftPlus to access your Dropbox account.
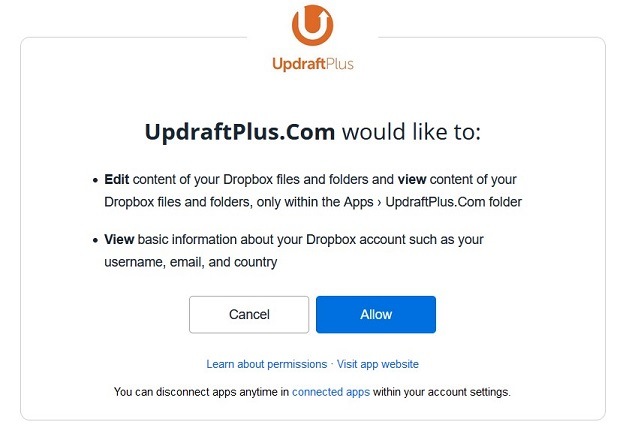
Click on ‘Allow‘ button to continue. You will be redirected to UpdraftPlus website where you need to click on ‘Complete Setup‘ button to finish setup.
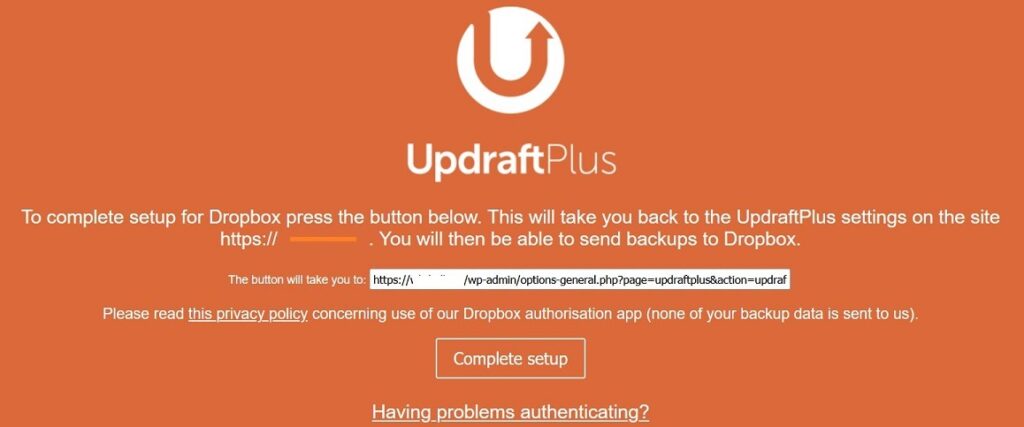
You are now redirect back to your WordPress site and you will see the UpdraftPlus settings page again. Scroll down to the bottom of the page and click on the Save Changes button.
Creating Manual WordPress Backups with UpdraftPlus
UpdraftPlus can automatically create backups based on the schedule you selected earlier. However, you can also manually create backups any time you want.
First you need to visit Settings » UpdraftPlus Backups and click on ‘Backup Now‘ button.
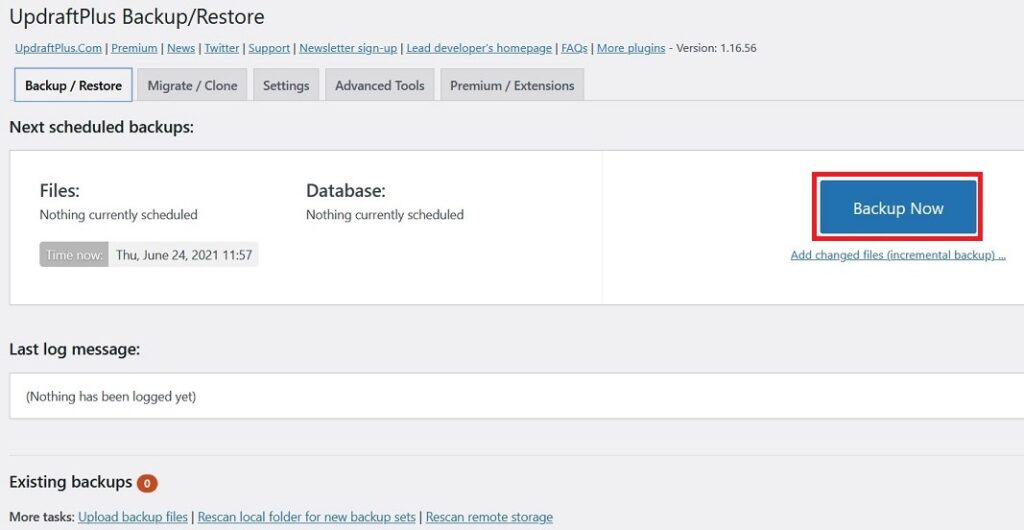
You will get a pop-up option to select files and database as shown in the following image:
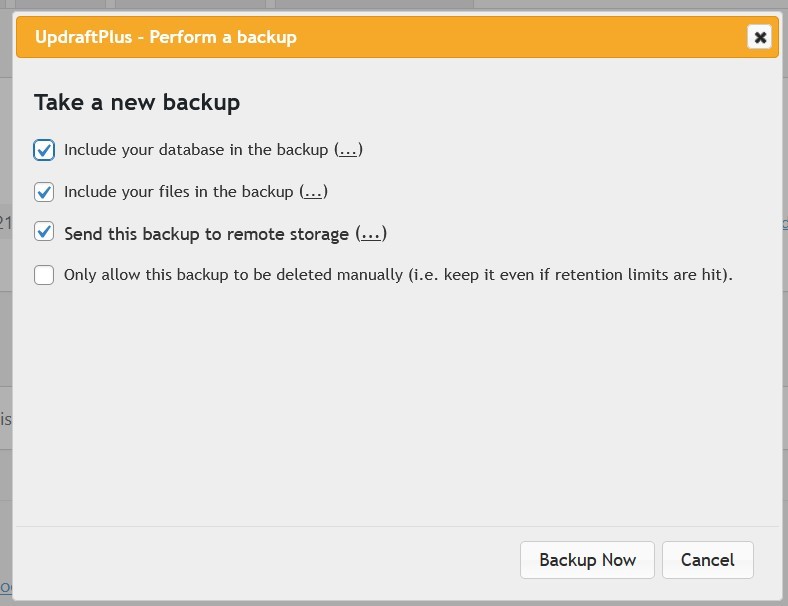
Click on the ‘Backup Now‘ button to continue.

Backup process may take a while depending on your data size.
Restoring Your WordPress Backup with UpdraftPlus
UpdraftPlus makes it easy to restore your WordPress site from a backup. If your WordPress website is compromised, hacked or broken etc. and you would like to restore from the backup, first you will need a clean WordPress installation.
Next, you will need to install and activate the UpdraftPlus plugin again on your fresh WordPress site. Upon activation, you need to visit Settings » UpdraftPlus Backups » Backup / Restore tab.
Since we have performed the fresh WordPress installation, it will not detect any local backup file. If you have saved the backup files on your computer, then you can click on ‘Upload backup files‘ link to manually upload and restore them.

You can also reconnect your remote backup by following the steps mentioned earlier and then you can use “Rescan remote storage” option to fetch the backups from your remote storage.
During restore, it will ask you the components you would like to restore. Since we are doing full restore, we will select all components
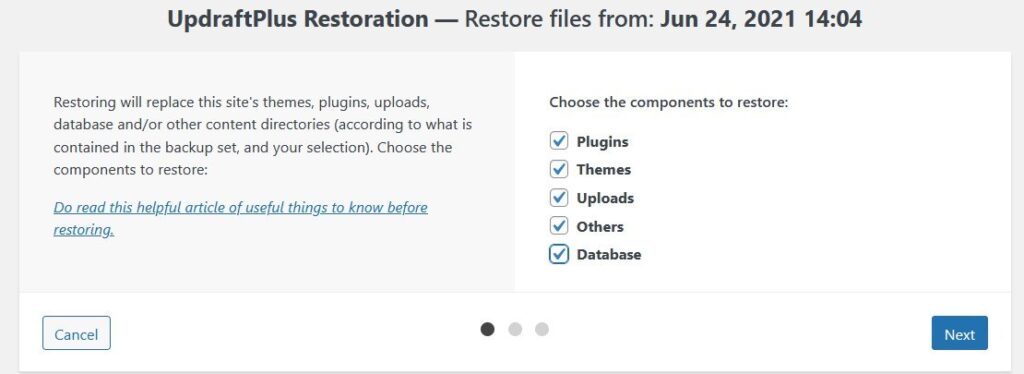
Click ‘Next‘ button to start restore process. On next screen, you will get an option to exclude any database tables. You do not require to exclude any table during full website restore. Now our actual restore process is started and you will see the progress. During restore, your login session may expire but you will still see the restore progress. On completion, you will get the following screen:
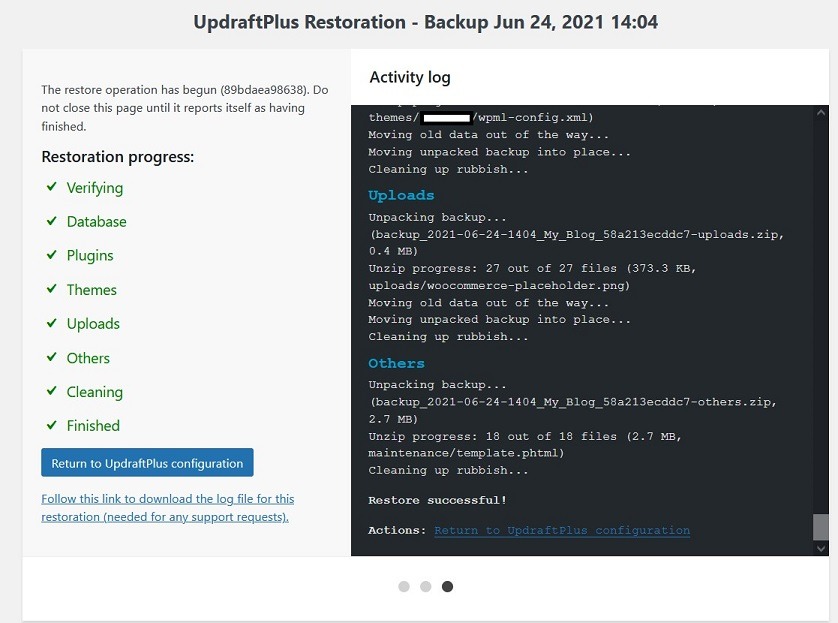
That’s it! You have now successfully restored your WordPress website using UpdraftPlus backup. Hope you have now clear idea about UpdraftPlus WordPress backup plugin tutorial.


Thank you for sharing step by step guideline to backup and restore WordPress website using UpdraftPlus WordPress plugin.
Really useful tutorial for the WordPress website users who want to backup and restore WordPress website using UpdraftPlus WordPress plugin.